Archive for the ‘Home’ Category

Renovation Update Week 10

Plumbing end

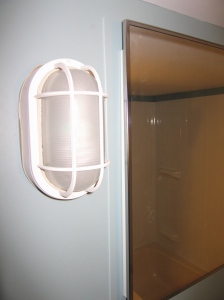
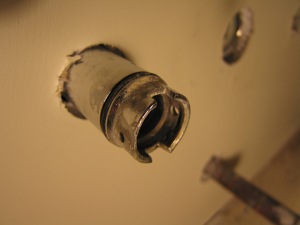
Jason’s artistic photo of something he was trying to remove. He sent me armed with this and several other photos to Home Depot, where the knowledgable sales associate was thrilled to have pictures.

The House

After last week’s flurry of activity, it felt good to have a light weekend. I was out of town for most of it (Jason’s first solo overnight with two kids was declared a success!), and then we decided to do some pumpkin picking with the kids, clean up our trashed house, and it was Jason’s weekend to go to his friend’s for their Homeowner’s Co-op.

While I was in Cleveland, during naps and after bedtime, Jason caulked the tub surround, replaced the broken pump in the washing machine, and wired and installed the fan/light combo fixture. He’s a show off 🙂

Laundry Room

  • Clean
  • Move things back in

Move radiator lines

  • Move living room radiator
  • Move 2nd floor bedroom pipes

Allegheny Millwork-Andy

  • Call with measurements for estimates
  • Order stairs

Bathroom

  • Finish mud
  • Prime (Christi)
  • Install door
  • Bathtub surround
  • Bathtub plumbing/faucets/shower
  • Vent/fan
  • Paint vanity (Christi)
  • Install vanity, contact paper on bottom shelf
  • Medicine cabinet
  • Lights & outlets
  • Trim
  • Paint trim (Christi)
  • Paint (Christi)
  • Clean fixtures & floor (Christi)-bathtub cleaned!
  • Install hand-held sprayer, shower curtain/rings/rod, toilet paper holder, hand towel/reg towel bars, robe hooks, washcloth holder(s), shelf, and some kind of wall-mount cabinet. Also need to find: bath caddy for shower head, something to hold 4 washcloths, bath mats, and a garbage can.

2nd floor bathroom

  • Plan
  • Build separation wall in kitchen

Donate old doors and windows

Paint back wall of house (christi)

Framing

  • Living Room
  • Dining Room
  • Blocking

*Electrical

  • Make plan
  • Plan reviewed by electrician
  • Install Boxes
  • Run wires

Insulate

OSB Walls

*Drywall


The Money

Grand total of $37.13 on new knobs for the vanity, many roller covers, and caulk for the tub surround.

The Kids

Nothing new here.

The Lovebirds

Nothing to report. I mean, we’re stil in love, but that’s not news, right 🙂

Renovation Update Week 9

bathroom renovation

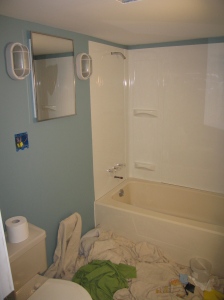
All this in one week!

The House

I painted the back of the house during nap time on two beautiful days last week. Fastest painting ever! Nothing motivates like not knowing when the kids will wake up.

After some light begging, my mom drove up for the weekend to be primary caregiver to the kids while I helped Jason with the house. We accomplished so much (THANKS, MOM!). Jason finished moving radiator pipes on Saturday morning. He filled the system, then had to drain it because there was a leak. Second time was the charm, and just in time for it to get down to 37 degrees on Satruday night!

Saturday at 1pm, Jason’s friend came to help for a few hours and they replaced the bathtub plumbing/faucets/shower and installed the tub surround. The tub surround was tough because the ceiling is so low that the surround had to be cut down on the top. When I say low, I mean that the shower sprayer hits me in the chest, and I’m 5’8″. We will definitely be installing a hand-held sprayer.

While they worked, I moved a few things that were left back into the laundry room, cleaned up some of Jason’s piles, and started painting the bathroom and vanity cabinet.

On Sunday I finished the painting–almost. I’ve decided to do one more coat on the vanity (4!) because it’s still not totally evenly white (I did finish that yesterday, on Wednesday afternoon). We found a beautiful blue in our Oops Paint collection–you know, the returned but custom-tinted paints at Home Depot and Lowe’s. $5 for a gallon of $25 paint. I check the paint desk every time I walk into one of these stores, and we probably bought this particular can of paint at least a few years ago. AND it covered beautifully in one coat. I like the color so much (and we have so much left) that I’m seriously considering painting the second floor bathroom the same color.

bathroom renovation

Almost there…

While I painted, Jason drilled a 4-inch hole through the side of the house to run the bathroom vent pipe through. The space he was working in was awkward and criss-crossed by about 5 pipes of various sizes and a few wires, too. After that was finished he installed the door jamb kit (pre-primed!) and started working on the $5 Construction Junction door.

Before hanging up my work clothes for the evening, I tackled the bathtub. This bathtub was, for 4-5 years, where Jason stored buckets of scrap to be recycled and his bike tire collection. It took 1.5 hours and shower cleaner, dish soap, Goo Gone and two different grits of sandpaper. I’m still sore.

Monday night, even though he was on solo bedtime duty, Jason finished the door and hung it.

Tuesday night while I was on solo bedtime duty he installed the medicine cabinet, the lights on either side, the door trim, and the doorknob.

Significant progress!

Laundry Room

  • Clean
  • Move things back in

Move radiator lines

  • Move living room radiator
  • Move 2nd floor bedroom pipes

Allegheny Millwork-Andy

  • Call with measurements for estimates
  • Order stairs

Bathroom

  • Finish mud
  • Prime (Christi)
  • Install door
  • Bathtub surround
  • Bathtub plumbing/faucets/shower
  • Vent/fan
  • Paint vanity (Christi)
  • Install vanity
  • Medicine cabinet
  • Lights & outlets
  • Trim
  • Paint trim (Christi)
  • Paint (Christi)
  • Clean fixtures & floor (Christi)-bathtub cleaned!
  • Install hand-held sprayer, shower curtain rod, toilet paper holder, hand towel & reg towel bars, robe hooks, washcloth holder(s), shelf, and some kind of wall-mount cabinet.

2nd floor bathroom

  • Plan
  • Build separation wall in kitchen

Donate old doors and windows

Paint back wall of house (christi)

Framing

  • Living Room
  • Dining Room
  • Blocking

*Electrical

  • Make plan
  • Plan reviewed by electrician
  • Install Boxes
  • Run wires

Insulate

OSB Walls

*Drywall

The Money

Grand total of $104.55 this week for a box of drywall screws, copper elbows, and a new faucet/shower combo and copper fittings for the bathroom.

We bought $400 in Home Depot gift cards from Giant Eagle last week, which we used for the above purchases. Our rewards credit card gives us 6% back on all grocery store purchases, and Giant Eagle gives us .10 per gallon of gas for ever $50 we spend. It’s an easy way to get a little discount on never-discounted building supplies.

The Kids

The kids enjoyed having their Nana all weekend and actually celebrated when they heard we were leaving.

The every-other-night solo bedtime duty is working very well. I had a board meeting one night and wrote on another, and Jason’s been feeling less guilty about going downstairs to work.

The Lovebirds

Nana gave us a date night on Friday night after she arrived. What did we do? We went to REI to buy shoes for J, went out to dinner, and then decided we were tired and had a full day on Saturday. We arrived home by 8:30pm.

But really, the whole weekend was a date since were in the basement working together with pretty minimal interruption.


Renovation Update Week 8

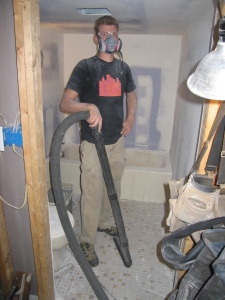
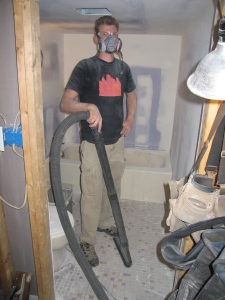
Jason sanding drywall mud

I’ve probably used this picture too much, but it makes me laugh!

The House

Jason finished sanding the last coat of drywall mud in the bathroom very early Saturday morning. Sunday afternoon I vacuumed up the drywall dust from the ceiling walls, fixtures and floors in the bathroom. While I was conquering dust, Jason was moving and repairing radiator pipes. That project, like most, ended up taking more time than estimated and pipes are still not together. Fortunately the weather is cooperating.

Wednesday and Thursday of this week are Jason’s nights to work downstairs, and then my mom will be in for a long weekend on Friday. She’s coming specifically to watch the kids so we can work on the house, so I’m hoping to see a few more things crossed off of this list next week!

A friend of ours, who happens to be a former boss of Jason’s, contacted us about someone he knows who makes stairs locally. That means someone reads my blog! It also means a local craftsman, an option which we’d prefer to see our money support. Our contractor is installing the stairs and has a relationship with Allegheny Millwork, so we’re going to get estimates from both. If the local craftsman comes close to the contractor pricing for Allegheny Millwork, we’ll be introducing our contractor to someone new.

Look, just look–we crossed THREE things off of the list in the last 7 days! If nothing else, this blog certainly keeps us accountable for how we’re spending our time and motivates us to work.

Laundry Room

  • Clean
  • Move things back in

Move radiator lines

  • Move living room radiator
  • Move 2nd floor bedroom pipes

Allegheny Millwork-Andy

  • Call with measurements for estimates
  • Order stairs

Bathroom

  • Finish mud
  • Prime (Christi)
  • Install door
  • Bathtub surround
  • Vent/fan
  • Paint vanity (Christi)
  • Install vanity
  • Medicine cabinet
  • Lights & outlets
  • Trim
  • Paint trim (Christi)
  • Paint (Christi)
  • Clean fixtures & floor (Christi)

2nd floor bathroom

  • Plan
  • Build separation wall in kitchen

Donate old doors and windows

Paint back wall of house (christi)

Framing

  • Living Room
  • Dining Room
  • Blocking

*Electrical

  • Make plan
  • Plan reviewed by electrician
  • Install Boxes
  • Run wires

Insulate

OSB Walls

*Drywall

The Money

Jason ordered some copper fittings from McMaster-Carr totaling $26.81 in order to move some radiator pipes.

The Kids

When Paige heard the shop vac running early Saturday morning, she asked, “Where Mr. Bryan?” Mr. Bryan Holland is our contractor, and Paige thought he was awesome (as did we!). We’re switching to an every-other-night bedtime duty, so Jason will have three nights each week from 7-10pm to work on the house.

The Lovebirds

We’re working to adjust to a very different pace of life. We usually spend an evening or two each week with friends, but we need to work on the house and write and it’s become hard to make that time. Jason and I keep trying to remind ourselves that it’s not forever, and the more time we put in now, the less time this house will drag on/the sooner my work will reap financial reward (thereby funding the house project and finishing it more quickly). Some blogger I read this week said that with very young kids, schools, careers taking off, civic obligations and volunteering, this will be the busiest time of his life. I couldn’t agree more.


Worm Bin at 2+ Months: How To Kill Most of Your Worms

This is the second post in a series about life with a worm bin.

Read the first post, How To Set Up a Worm Bin, here.

**********

Worm bin set up in kitchen

This article could have the alternate title of How to Screw Your Karma Approximately 3,000 Times.

We assembled the worm bin in May, and they were doing great. So many new worms and lots of worm eggs. The booklet they came with said that after two months in ideal conditions that they multiply to around 3,000.

Only minor problems so far…

Problem #1: I think the cup of compost we brought in from our outdoor composter had fly eggs in it. Two days after setting up the worm bin, we noticed several slow flies buzzing around the house. So slow that I could catch them in mid-air. We’d kill them, and the next day there would be four or five more. This went on for about a week.

Problem #2: And this is a common problem, my friend Joy assures me: After about a month, the worms had eaten through the soggy newspaper lining the bottom of their tray and were falling through into the liquid collection tray. Every week or so I’d have to get a big spoon and scoop them up and dump them back in the processing tray. Apparently when you add a new collection tray, they begin migrating upward and stop falling through (as much).

Not many problems at all!

Near the end of June it was time to add a new processing tray. I followed pretty much the same procedure as with the first tray. Only I didn’t have to lay the bottom layer of newspaper down because I wanted the worms to migrate upward.

About two weeks later I prepared the worms for our long trip to Maine by giving them lots of food. Many of them had moved into the top tray and were munching happily. And then we drove to Maine.

While we were in Maine, the day we left, actually, until the very day we returned (all 9 days), temperatures outside reached 98 degrees or above with no rain and almost no clouds at all.

Our kitchen is uninsulated. And on the second floor.

The kitchen roof is almost flat and faces southwest. And there’s a wall of windows facing west in the sunporch attached to that kitchen.

We arrived home on July 8 at 12:30am to 78 degrees outside and 98 degrees inside our kitchen. We had shut and locked every window before we left, so there was no ventilation for that heat to escape.

WARNING: If you can’t handle the death of innocent creatures, here’s a recipe for Harvest Soup. It’s much easier to digest than what happens next.

So as we’re sweating, frantically opening windows and strategically placing fans on barely working legs fresh from an 18-hours-in-one-day road trip, all while trying to keep two little kids as asleep as possible, I saw something that made me sick. Little black lines radiating out from the worm bin under the kitchen table.

I didn’t say a word, but kept at the task of cooling the house so the incredibly upset kids would go back to sleep. And at 2:30am, when my head finally hit the pillow, I shoved those lines as far out of my mind as I could.

The next morning, I went in for the inspection. And I found nothing alive. Those squiggly lines were worms that were trying to escape and ended up baked onto our kitchen floor.

The only time worms will try to leave the bin (they don’t like light, after all) is if the bin becomes uninhabitable. I’m guessing a steady temperature of 100 degrees meant uninhabitable.

I took the black bin to the backyard and left it by the compost bin, lid on, for two days. It was hot, sunny, and around 86-89 degrees. I just couldn’t face cleaning it out. I felt so horrible, so guilty, for not thinking to take the worm bin to the basement before we left town. I called Joy, my personal worm bin guru who taught me everything I needed to know when I was deciding whether or not to take the plunge, and cried in her ear. I moped. I made many sad faces and left the crispy worms stuck on the floor, a memorial to my once thriving community of eating and crapping worms. I made Jason a little crazy.

Finally, on the third day during nap time, I tackled the very smelly job of cleaning out the worm bin. Smelly because it was full of 3,000 or so decomposing worms. Cleaned it out while moping and feeling guilty, I’ll have you know.

And what do you know, what do you think I found? Right in the bottom tray, the first processing tray, right in the very middle of the tray was a group of live, wiggling worms in an area about the size of a baseball. They were all small worms, but they were packed pretty tightly together. My theory is that they had hatched fairly recently and their location in the middle of the bottom bin meant that they were the most well-insulated from the heat.

I celebrated! I called Jason, my mom, and I may have called Joy, but at the very least I emailed her. I smacked myself for leaving the worm bin out in the direct sun for another two days. And then I celebrated some more!

Renovation Update Week 7

Jason sanding drywall mud

This picture still makes me laugh.

The House

Other than finishing the drywall mud in the bathroom (Jason) and the cleaning in the laundry room (me), we took much of the last week off.

We did make our punch list, somewhat in order of priority, that we hope to accomplish during the contractor’s hiatus over the next couple of months. Anything with an asterisk will be mostly or entirely hired out. Here you go…

Laundry Room

  • Clean
  • Move things back in

Move radiator lines

  • Move living room radiator
  • Move 2nd floor bedroom pipes

Allegheny Millwork-Andy

  • Call with measurements for estimates
  • Order stairs

Bathroom

  • Finish mud
  • Prime (Christi)
  • Install door
  • Bathtub surround
  • Vent/fan
  • Paint vanity (Christi)
  • Install vanity
  • Medicine cabinet
  • Lights & outlets
  • Trim
  • Paint trim (Christi)
  • Paint (Christi)
  • Clean fixtures & floor (Christi)

2nd floor bathroom

  • Plan
  • Build separation wall in kitchen

Donate old doors and windows

Framing

  • Living Room
  • Dining Room
  • Blocking

*Electrical

  • Make plan
  • Plan reviewed by electrician
  • Install Boxes
  • Run wires

Insulate

OSB Walls

*Drywall

The Money

No money spent! I suspect this will be the last week that happens for a long time!

The Kids

Nothing new to report.

The Lovebirds

First weekend away from our kids where one of us isn’t in a hospital. Enough said.

How To: Mop the Floor With Kids

How to mop the kitchen floor with kids

P and J having a really good time. This was taken right after I put the bowls down, so they hadn’t yet had time to drech themselves completely.

I’ve mentioned we’re a little busy right now. In a few weeks, things will calm down a bit. Mostly though, this pace will stick with us for the foreseeable future, and I’m working to adjust to it. In order to make room for a few things, I had to make a conscious decision earlier this year to let go of a few things, and cleaning is one of them. Daily cooking is another–you can read about that one on Friday.

I’m not saying I’m going to let that piece of cheese rot on the floor for the next year. Only that I’ve relaxed my standards. I used to like to mop at least every two weeks. Our kitchen is small and we have two young kids (and added a few thousand worms to it recently). Two days after mopping it, it is visibly dirty again.

Mopping is a task that isn’t easy to do in a tight space with two little kids underfoot. Historically, I would put them down for a nap, vacuum and then mop, and have about half an hour before they woke up. Now, I use every minute of nap time either writing, doing volunteer work, or keeping up with friends and family.

I can’t remember why I was desperate, but something happened on the kitchen floor in the middle of a crazy few days this spring, and I didn’t have time to mop.

Then it hit me–a housekeeping hack! Why not let the kids help me mop the floor? 

Here’s how you can have your own anklebiters helping you mop the floor in no time:

Step 1: Gather bath towels and a full change of clothes (including diaper) for each child and place in the room adjacent to your kitchen.

Step 2: Gather various sizes of cups, pans, bowls, spoons, and rag-towels. Rag-towels (n): Hand and bath towels no longer fit for post-bathing, but good for cleaning up messes.

Step 3: Fill the larger bowls & pans with warm, soapy water. I use a few drops each of castile and dish soap.

Step 4: Put the pans & bowls of water in the middle of the kitchen floor. Give the kids the spoons and cups, and they will typically sit or kneel down to the level of the bowls & pans. *Put lots of rag-towels around them. You can either join in at this point or sit at your kitchen table, sipping a hot cup of tea, congratulating yourself on your brilliance while you occasionally throw another rag-towel into the melee.

*In our house, our kitchen floor slopes so much that I only need to put towels on one side of them.

Step 5: When the kids are finished, dump all of the containers of water into a bucket and ask them to help you scrub the floors with the rag-towels, which are conveniently already wet and soapy (you’ll probably need to wring them out a bit). They won’t do a great job but, hey, they’re learning!

Step 6: Get a sponge or mop or whatever and use the last of the water to mop! Our kitchen is small with lots of corners and nooks, so I always just use a sponge on my hands and knees with the kids.

Step 7: When the kids can’t clean any more, the towels and clothes are ready for them in the next room.

Please note that if you have flooring that you love, flooring that isn’t waterproof, or flooring that was made after 1990, this probably isn’t how you should clean your floors.

There you have it: A way to make a not-so-fun task fun AND kid-friendly during times of crazy schedules. And if you join in, you just turned mopping the floor into a quality time activity!

**********

Have any great housekeeping “hacks” you can share with me? I’m always looking for more!

Renovation Update Week 6

Drywall dust mitigation

Jason cleaning up drywall dust in between coats of mud.

The House

We’ve enjoyed showing off our fledgling renovation project to our friends and family over the last week. It’s such a stark contrast to the crammed-full-of-junk rooms that the first floor used to be.

This weekend we were on the receiving end of the Homeowner’s Co-op, so there was an extra set of hands (and another strong back!). Jason and his friend worked in the basement laundry room (not actually a laundry room, but a large room with the laundry area in one corner). They fastened wires and pipes to the new floor joists above and cleaned a little, while I cleaned off one of the workbenches in the middle room and then sanded the drywall mud in the basement bathroom. It was a very, very dirty day. This, after showering and looking all nice a few hours before for our family photo swap.

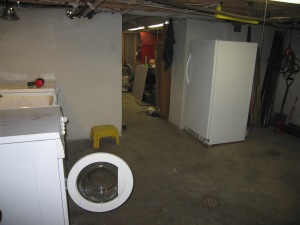
Basement Laundry Room looking to workshop

Basement “laundry room” that will be mostly storage when I finish cleaning it. this view is looking from the back door into the workshop.

Then I emptied out the upright freezer that’s been living in our kitchen for the last three months and the guys carried it downstairs. Boy, was I glad not to have that job again! The going up two flights of winding stairs left my back sore for days. As a bonus, taking everything out and then putting it back in allowed me to quickly organize the freezer.

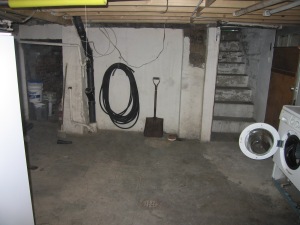
Basement laundry room

Basement laundry room looking towards the back of the house.

The Money

We’ve spent a little over $8 on 2x4s this week (giftcards covered the rest), so no significant spending right now. I’m guessing over the next three or four weeks, we won’t spend much.

The Kids

Nothing new to report.

The Lovebirds

I realized this afternoon that I’ve had to remind Jason (twice in the last 24 hours) of the next items on our punch list that we recently talked over.  Unfortunately, there’s a lot to accomplish and an order in which we need to work on our projects during the contractor’s hiatus. I think he and I should sit down and put our plan for this time in writing so we (I’m guilty, too!) don’t get distracted by some project thats more gratifying but less of a priority.

7 Tips for Battling Clutter Creep

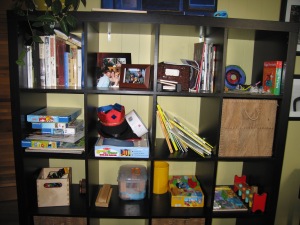
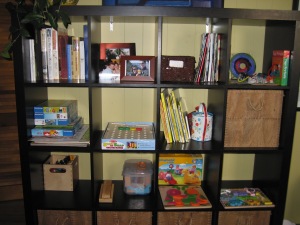
Ikea bookshelves in living room

Before: Actual shelving in my living room this morning. Lots of stuff tends to migrate here.

We’ve all had it happen. We straighten and clean until we get that one almost clear surface except for the two pictures or knick knacks. We stand back and admire our handiwork, congratulating ourselves on how neat our house looks. Two days (or one hour) later, someone sets the camera and its battery charger there. Then a funny book a friend picked up at the store when they thought of you. A broken Hot Wheels car, hairbrush, candle that you found under the sofa, hair clips, a ripped pop-up book, and some spare change all migrate there, creating a motley and towering pile of clutter.

Clutter Creep.

How is it possible that we have so much stuff?

Even with purging an estimated 60% of the items we own in 2011, we still have lots of stuff. I honestly might be lowballing that number. But new things don’t stop coming through the front door. With kids, this seems unavoidable. More hand-me-downs for the kids to grow into, more electronics with more cords, more coffee cups (where do they all come from?!?).

Here are my seven tips for keeping the clutter monster at bay…

  1. Everything needs a place. I can’t stress this enough. You can’t put it away if it doesn’t have a home. Our kids received a portable DVD player and headphones in May that Jason and I just kept moving around from one place to another. I finally, just last week, gave them both a home.
  2. Don’t put it down, put it away. This is how 95% of the clutter in my house comes to be.
  3. If you don’t love it and it isn’t useful, don’t keep it.
  4. Think about how you use a room. We use our living room for playing with our kids, exercising, reading magazines or to the kids, watching movies with family, and enjoying friend and family visits, sometimes with football or Olympic opening ceremonies on the tv. Once we realized those uses, we realized that having a home for the cameras and video camera, the yoga mats, weights and exercise book, the trucks, cars, and children’s books, the toys, DVDs, and snuggle blankets were all more important than our SIX shelves of books that we rarely look at. So most of the books were moved to the bedroom.
  5. One in, one out rule. Some folks apply this to clothing. We’re not too strict about this since we had so little left after 2011’s purge.
  6. Designate a spot in your house for outgoing items. We have a cabinet that takes up about a third of a piece of furniture in our sunporch (actually a mudroom, since it’s where we enter our house). That cabinet is where I throw things that go out, including returns or hand-me-downs for friends and family. When it’s full, I bag it and drop it off at Goodwill. Before that, I used a cardboard box under a bench on the sunporch. Don’t forget the receipt for your taxes!
  7. Take that 10 minutes to go through just one drawer, shelf, or cabinet. I often have a few minutes while I’m waiting for something or someone. Quickly clear off the mantle of anything that doesn’t belong in those snippets of time and put it all away.

The first three are the most important to me. Last year, we gave everything a home that made sense. This year I’ve been repeating the mantra, “Don’t put it down, put it away.” I’ve found when I get in a rush, we have a rough week, or someone is sick, this is the first thing to go. The worst part is that I often put the thing right next to the drawer in which is should go, and it would have taken exactly two seconds to put it away. I’m easily distracted and incredibly lazy given the right circumstances!

I don’t have any set schedule when I clean out closets or anything. That sounds waaaay too organized for me. My system is this: when I see something that’s constantly a mess or bursting at the seams, I know it’s time to go through and look for donations. For example, we have three places in our house for adult books and three for kid’s books. If those shelves and baskets are always a mess OR I can’t fit another book anywhere, I know it’s time to get rid of a handful.

Ikea bookshelves storing toys

After: While I was waiting for my soup to boil, I pulled everything off that didn’t belong, wiped a damp cloth over (most of) the shelves, and put (or threw) away. Took me exactly 9 minutes. There were about 10 things that went into the donation bin or garbage.

**********

How do you battle clutter creep in your home?

How To Set Up A Worm Bin

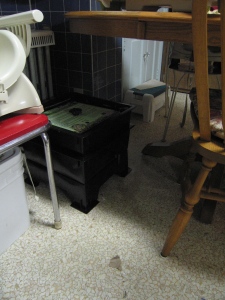
Worm bin vermicomposter in kitchen

The worm bin’s cozy home under the kitchen table.

Under our kitchen table in a black box live worms. Many, possibly thousands, of worms.

In April of this year, I ordered a vermicompost bin and worms from Gardens Alive, an online and mail order garden supply retailer. They offer coupons every so often for $25 off of $100 purchase or $50 off of $150 purchase that made the worms free, so once I made my decision, I waited for another coupon to come out. Three days later, there it was in my inbox.

So for less than $100, I was the proud owner of one vermicompost bin and 1,000 worms. The bin was delivered very quickly. I of course paid no attention the instructions telling me to set up the bin completely now, before my worms arrive. Because I was going camping with two young kids and in the middle of packing hell.
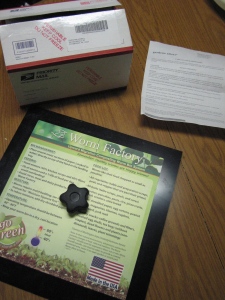
Worm bin and worms arrive in the mail

The bin, worms in their little box, and the directions.

Unfortunately, it was a warm weekend and when we arrived home on Monday afternoon in 92 degree heat, we found this box wedged between our storm and main doors.

Box containing worms

This is the box in which the worms were delivered.

Because it was a holiday weekend, that meant they had been there since Saturday–through two and a half very hot and humid days, and touching a metal and glass door. I was a little concerned they would all be dead. I quickly checked them and it looked like everybody was alive. Yay for thorough packaging!

Step #1: Lay the Foundation

The first thing I needed to do (after assembling the bin) was wet several pieces of newspaper and lay them on the bottom of the tray. This keeps the worms from falling through into the drain tray below.

There are no pictures of the wet newspaper step because Jason, despite his serious aversion to all things that slither and wiggle, ran to get the camera, change its batteries, etc. at about this time in order to document the process (thank you, Jason!)

Step #2: Go To Bed

Next came the bedding layer. I took a cup or so of compost from our outdoor composter and put that in a large bowl. To it I added half of a block of coir that was included with the instructions and several handfuls of shredded newspaper. Then I moved it all into a much larger bowl. And then I stirred and moistened it all slightly.
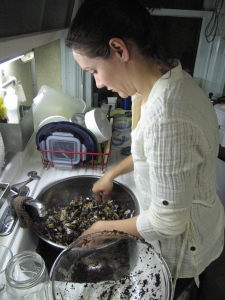
Worm bin set up

The silver bowl is so huge that we could easily bathe a six month-old in it. Go ahead, ask me how I know.

I then added this mix to the bin, spread out on top of the wet newspaper. It looked a little thin, so I shredded some more newspaper and mixed it in. the picture below shows me throwing it on, before the paper is mixed in.
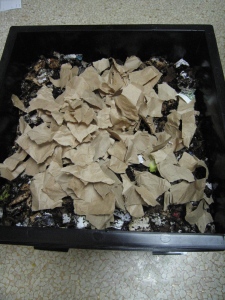
Worm bin second layer

This is the bedding layer. Exciting, right?

Step #3: Keep It Dry

Then I layered dry, shredded newspaper on top of the bedding layer. I actually moistened this at some point, forgetting that I was supposed to leave it dry. Don’t do what I did.

Worm Bin shredded newspaper

Third layer of shredded newspaper, just barely moistened.

Step #4: Last Layer

Finally I prepared a fairly thick layer of wet newspaper  to lay on top of the shredded newspaper. This helps keep the light out, keeps the humidity up, and encourages the worms to remain in the bin. Not that they’ll try to escape except in extreme circumstances–they don’t like light, so they want to stay in the bin where it’s dark.
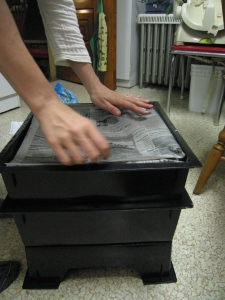
Last worm bin layer

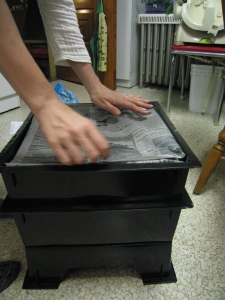
Applying the final layer of wet newspaper on top of the bedding.

Step #5: Welcome Home

Finally, I was ready to add the worms. Inside the mailing box was lots of shredded paper packed tightly. Inside of that was a paper bag, slightly moist, and inside of that, this white bag.
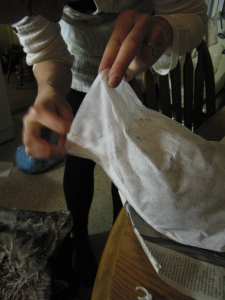
Opening the worm bag

They’re in there!

I tried to dump them gently into their new home, hoping that most had survived the heat of the weekend.
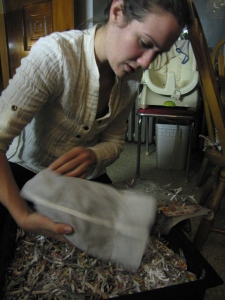
Adding worms to the vermicomposter

I’m concentrating super hard.

I realized later that I should have added the worms on top of the bedding layer, then topped with the dry, shredded newspaper layer. Oh well. Again, don’t do what I did.
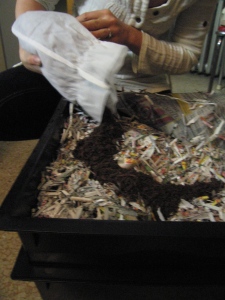
Adding worms to the worm bin

So exciting!

Jason moved pretty close to the big pile of 1,000 worms for the photo below. At this point, because they were stressed, they were massed together pretty tightly.
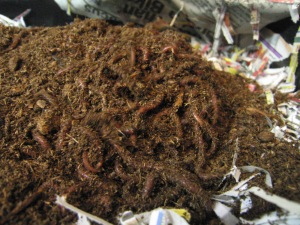
Red Wiggler vermicompost worms

Do they look happy to you?

Step #6: Settling In

Not pictured, for some reason. Add a handful of food to one corner of the bin below the bedding layer. Chop it as finely as possible, and even cook it a little to make vegetables softer and more palatable. Did I just say palatable in relation to worm food? Yup, I did.

Pop the lid on and put them somewhere a little dark and a little quiet.

Set up of worm bin

Putting the lid on our new pets.

We completed this project after the kids went to bed, so in the morning, I introduced J and P to their new pets. They both are enjoying the worms.

Our worm bin lives under our kitchen table. In another post, I’ll post a longer update on how the worms are doing, and mostly it’s positive. I can’t forget about them since I see them every day, and they seem to be pretty comfortable most of the time.

**********

If you compost, do you have your composter outside, inside, or both? 
Renovation Update Week 5

new window full view door and structural beams

A view of the back wall of the house. You know, the one that leans out three inches bottom to top. It’s hard to tell, but that’s a seven foot wide window.

The contractor finished this past Friday. I was actually sad to see him and his helper go. They’re both intelligent and interesting people, and also were very courteous and kind to me and the children. If you have to live in a construction zone, there’s not much more you can ask for.

The House

The contractor left the first floor cleaner than he found it. I can’t imagine that’s common, and it made Jason’s type-A heart sing!

After looking at the completed framing, support beams, new floor joists (supporting both the first floor and second floor), and whatever else, Jason said that he is relieved that he didn’t attempt any of it on his own. Not only did the kitchen floor slope by almost three inches front to back, but it turns out that the back wall of the house also slanted out from the foundation by about three inches top to bottom. That happens to be the wall that had to have a wall built inside of it for support, and that holds the new window and door. I remember hearing some swearing on the day the contractor was putting in the window–I imagine it was from trying to install a window on a slant!

To recap: all framing and structural repairs and modifications are finished, and the new kitchen window (7 feet wide!) and back door are in and working.

Not much new on the basement bathroom. Jason was putting a coat of md on the drywall at 5:30am this past Saturday morning, and then took the rest of the weekend off.

The Money

I realized I was being remiss in talking about how the money actually works out, so I’ll do that to some degree here.

The contractor’s fees were very reasonable and we managed to pay cash for all of his work and the materials so far. We did have to dip into our emergency fund for part of his last bill, but only for about $1400 of it. It only gets more expensive from here, so we’ll start using our HELOC within the next month. My plan is to pay off large chunks of the HELOC with some of the checks we receive in the mail from our credit cards. They have been offering us 0% interest on balance transfers (and I think a HELOC qualifies) until at least next May. Since we pay our credit cards off every month and hate debt, we’ll have no trouble making this work for us. We actually used this exact system (with the addition of second jobs) to pay down the credit card debt that we each brought into our relationship.

The Kids

P really liked the contractor. She wanted to say hello to him every time she went outside and asked what he was doing or where he was constantly. J warmed up to him eventually. They both keep asking when he’s coming back.

The Lovebirds

We were hashing out our next steps in the renovation this weekend at Jason’s aunt & uncle’s house. The conversation was hilarious, peppered with funny comments and enlivened by afternoon drinks and fresh perspectives. We definitely have more to figure out, but it was a great step and we both came away with a few calls to make this week.